This is a guide on how to get the best out of Zoom and ensure that you run a successful, high quality event with as few hiccups as possible. If you are just getting started with Zoom, you may want to look at our basic Zoom guide first.
Make sure you have a decent internet (and WiFi) connection
This is really important, as the last thing you want is to be stuttery and hard to understand, or worse still, lose your connection mid-event! For an optimal experience you will need a decent internet connection (fibre broadband), and if you are using WiFi, a strong signal as well – make sure your computer is as close to the router as possible and is showing a good signal strength. Better still, if you can, plug your computer directly into the router with a network cable.
Bear in mind as well that if your internet is under heavy use during the Zoom meeting e.g. people in the house watching Netflix, downloading files etc, that can impact the quality of your Zoom audio/video.
To test out your connection, try setting up a test meeting with a friend or co-host before the real meeting, so they can check that you are coming through loud and clear.
Get a decent webcam and headset
Most laptops these days come with a built-in webcam, so you might not need to buy a separate one, but if you do (if you’re using a desktop PC, for example) then make sure you get one with good reviews, and don’t just buy the cheapest one you can find.
Similarly, most laptops come with built-in speakers and microphone, but it is highily recommended to get a headset (headphones with microphone attached), as Zoom audio quality can really suffer when the audio coming out of your speakers is then picked up by the microphone. Again, look for headsets with good reviews, and don’t just pick the cheapest.
Alternatively, if you’re using a laptop with a built-in microphone, you could get away with just plugging in some headphones and using the laptop microphone.
Set up polls
Zoom has a polls feature which can be a great way to interact with your audience during the event, with survey-style multiple choice questions appearing on their screen to answer. Once everyone has finished answering, you can display the results to everyone and show stats for each answer.
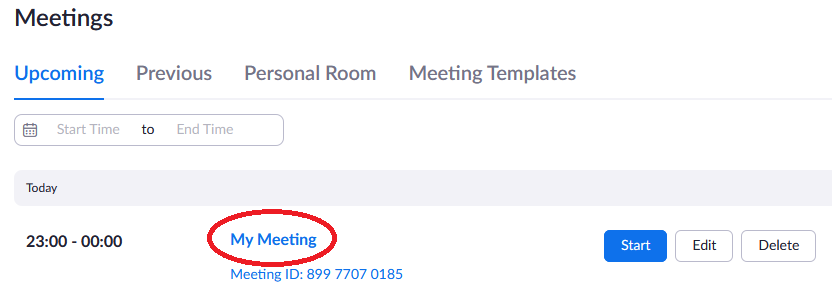
If you want to use this feature, you will need to set up your questions in advance. To do this, you will need to go to the Zoom website (NOT the app), log in and edit your meeting that you have scheduled (if you haven’t scheduled the meeting yet, have a look at the previous guide). After logging in, find your meeting in the list and click on its name (NOT the Edit button):
If you then scroll to the bottom of the page, you will see a Poll section. Click the Add button and you will get a popup form allowing you to set a poll title and add one or more questions. If you only want people to choose one answer from the list of possible answers, click the “Single Choice” option. If you want them to be able to select more than one answer, click the “Multiple Choice” option.
Make sure your poll is saved, and then when you actually run your Zoom meeting on the day, you will find a Polls button at the bottom of your screen. When it is time to ask the questions to your audience, click this button and select the poll to make it appear on their screens. You can even set up multiple polls to appear at different times throughout the event; just make sure you choose the right poll from the list when clicking the button.
Assemble a team of co-hosts
This is especially true if the person running the event will also be doing most of the speaking/presenting during the event. As an event host, you will need to make sure the right people are coming into the meeting, possibly share your screen, mute people if they are creating too much noise, keep an eye on the chat to see what questions are being asked… the list goes on. This is a very difficult juggling act for one person to do alone, so consider getting a couple of people to help you out, and delegating these jobs. Then you can concentrate on the speaking part without worrying about the technical aspects.
On the day of the event, it is advisable to start the meeting a few minutes early and check in with the hosting team to make sure everything is set up and ready to go. This gives you the chance to promote people to co-hosts in Zoom, which gives them permission to share their screen, mute people etc. If you are worried about audience members joining early, you can turn on the waiting room, and only let them in once you and your team have got everything ready.
If you have any guest speakers joining, it would be wise to ask them to join a few minutes early as well and make them a co-host so they can share their slides, if they have any. It might also be worth asking them to send you their slides in advance so you can take over sharing duty if they have any technical problems.
Check the meeting settings
When you initially scheduled your Zoom meeting (see the previous guide), there were various settings to choose from. When you start your meeting, you will find that there are even more settings, some of which were not accessible when scheduling the meeting! Click on the Security button at the bottom of the screen, and make sure you are happy with the settings:
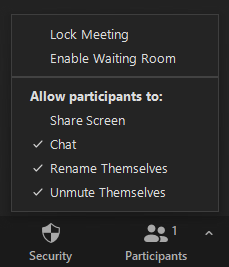
For example, depending on how tight a ship you want to run, you may want to stop people from unmuting themselves, in which case you and your co-hosts would be in charge of unmuting people who wish to speak. It is highly advised not to let participants share their screen as you don’t know what they might share! Anyone who is a co-host will still be able to share their screen, however.
Establish housekeeping/ground rules
At the start of a meeting, it’s a good idea to go through some basic housekeeping with the audience to ensure everything runs smoothly. Normally this would involve asking them to stay muted unless they are asked to participate, turning off their camera if they do not wish to be recorded etc.
In terms of the audience asking questions, you may prefer to have them type the questions in the chat and then have a dedicated segment during the event for asking these questions to the presenters. Alternatively, if you are happy for people to interrupt the speaker to ask questions, you can ask them to raise their hand (either by pressing the Raise Hand button or by physically raising their hand if their video is on) and then wait until asked to speak before unmuting and asking their question. Either way, someone in the hosting team will have a job to do: either monitoring the chat for questions or monitoring the audience to see if there are any raised hands.
Get to grips with screen sharing
If you or a guest speaker have any slides to share while talking, you will need to share your screen. To do this, click the green Share Screen button at the bottom of the window:

You will then be asked what to share; this could be your whole desktop or just a single window. For best results, you should always choose a single window if possible. This should be the window that contains your presentation – look for the name of the app you are using e.g. PowerPoint, Keynote etc. Once you are sharing, you should click the present/start slideshow button in your app that makes your slideshow go full-screen. Now everyone in the meeting should be able to see your slides. It’s worth practising this in a rehearsal meeting with your co-hosts to make sure you know how it works.
Don’t forget to press the Record button!
Finally, if you are planning to record your event for posterity, don’t forget to actually press the Record button at the start of your event! Another option is to set the event to automatically record in the scheduling options – see the previous guide for more details about this.
And remember: you can either record to your computer or to the cloud (which means you can download the video later from the Zoom website). There are storage limits for cloud recording, as mentioned in the previous guide, so you may have to record to your computer depending on whether you have a paid plan and space on your account.